Leave Your Message

7 Tips for Buying Fiber Laser Marking Printers

Choosing Fiber Laser Marking Printers is not just a matter of comparing wattage or advertised speed. The right machine must suit your materials, marking area, production pace, and inspection requirements. A stainless-steel serial plate, a small aluminum component, and a coated plastic part can demand very different settings. Details matter.

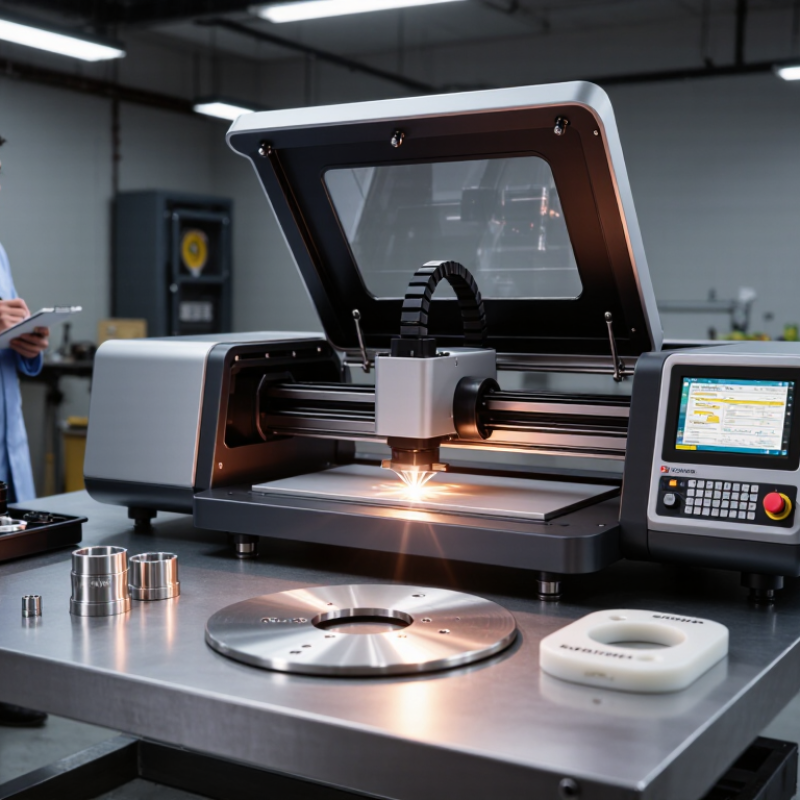
Before comparing models, define what the printer must mark each day. Note the material, part dimensions, required mark contrast, and expected cycle time. Ask suppliers for sample marks on your own parts, not only polished showroom samples. A clear mark under bright lights may look different beneath a camera or after handling. Test the real part.

A useful perspective comes from Elena Park, a fictional composite fiber-laser applications specialist created for this guide: “A good marking system earns trust by repeating the same clear mark across real production conditions.” The quote is illustrative, not a statement from a verifiable individual. That distinction matters when evaluating technical advice.

This guide’s seven tips focus on practical checks: laser source and power, lens and marking field, software, safety features, support, sample testing, and total ownership costs. Look closely at setup time, operator training, service response, and the availability of replacement parts. A lower purchase price can be tempting. It may not reflect the full operating picture.

Some specifications are easy to compare; others need a hands-on trial. Record the settings and results, and ask what changes when the material or production volume shifts. No checklist replaces careful testing. Use these tips to ask sharper questions and choose Fiber Laser Marking Printers that fit your actual workflow.
7 Tips for Buying Fiber Laser Marking Printers

Define Your Materials, Marking Goals, and Production Needs

Choose the material before comparing machines. Fiber lasers commonly mark stainless steel, aluminum, and coated metal, but plastics vary with their additives and color. Test the exact grade, finish, and coating—not just a clean sample. Aim for readable codes, dark contrast, or shallow engraving? Each goal can need different settings and cycle time. Test real parts.

Define the working conditions, too. Oil, curved surfaces, and part-to-part variation can change mark quality. Ask for sample marks using your production files, then inspect them under the lighting and viewing distance used on the factory floor. A sharp mark on a polished sample may look very different on a scratched part. That matters.

Production needs shape the right configuration. Record target parts per hour, shift length, available floor space, and how operators will load and locate each piece. The International Federation of Robotics’ World Robotics 2024 report counted 541,302 industrial robots installed worldwide in 2023. That broader automation figure is not a laser-marking forecast, but it highlights why cycle time and integration deserve attention. Check fixture repeatability, fume extraction, data input, and maintenance access before purchase. I would not trust a fast demonstration alone; real production is less tidy.

Compare Fiber Laser Power, Wavelength, and Expected Lifespan

Tip 1: Match power to the material and marking task. Higher wattage can shorten cycle times, but it may also add heat, widen marks, or damage fine details. Test a sample using the intended speed, focus, and line spacing. A black mark on steel may need different settings from a deep engraving. More power is not automatically better.

Tip 2: Check the wavelength alongside the material. Many fiber marking systems operate near 1064 nm, a wavelength commonly suited to metals and some engineered plastics. Results still vary with coatings, color, and surface finish. Ask for sample marks on your actual parts, not just polished demonstration pieces. Small differences matter.

Tip 3: Compare expected lifespan by component, not by one headline number. Ask how the laser source’s rated hours were measured and what operating conditions they assume. Long daily shifts, dusty air, and poor cooling can affect service life. Check warranty terms, replacement costs, and local service options. Also inspect the cooling and ventilation requirements before installation. A simple maintenance log helps reveal patterns, though it cannot predict every failure. I might overlook this during a rushed purchase. Don’t.

7 Tips for Buying Fiber Laser Marking Printers — Compare Fiber Laser Power, Wavelength, and Expected Lifespan

Buying tip What to compare Practical guidance Questions to ask before buying
1. Match power to the job Common configurations include 20 W, 30 W, 50 W, and 100 W. Lower power can suit basic identification marks and lighter-duty work. Higher power can help with faster marking, deeper engraving, or demanding production jobs. Results depend on the material, mark dimensions, and settings. Can the supplier demonstrate the required mark on your actual material at your target cycle time?
2. Check the wavelength Most standard fiber marking lasers operate near 1064 nm, commonly within roughly the 1060–1080 nm range. This near-infrared wavelength works well for many metals. Some plastics and coated materials respond inconsistently, so a sample test is important. Is the wavelength suitable for every material and finish in your application?
3. Consider material compatibility Material type, surface finish, coating, and color all affect the result. Fiber lasers are commonly used for metals such as stainless steel, aluminum, and brass. Marking behavior varies by alloy and surface treatment; certain plastics may need a different laser type. Can you provide sample marks for each material, including coated or anodized parts?
4. Compare pulse and marking settings Pulse characteristics, frequency, scan speed, and focal spot size influence mark quality and processing time. Power alone does not determine performance. Fine graphics, dark annealing marks, and deep engraving can require different combinations of settings. Are the pulse and scan parameters adjustable, and can the system save recipes for repeat jobs?
5. Verify the working area Lens choice determines the marking field and affects the focused spot size. A larger field can accommodate bigger parts, while a smaller field may support a finer spot. Check the usable field and focus distance for your part size and fixture. Does the proposed lens cover your part without sacrificing the mark detail you need?
6. Ask about expected source life Laser-source lifetime is model- and operating-condition-dependent; figures advertised by suppliers are not a universal guarantee. Fiber sources are often advertised in the range of about 50,000–100,000 operating hours. Treat this as a stated rating, not a promise of total machine life; duty cycle, temperature, cleanliness, and maintenance matter. What is the documented source-life rating, what conditions apply, and what does the warranty cover?
7. Assess the full system and support Review the scanner, controller, software, enclosure, extraction needs, service access, and warranty alongside laser specifications. A dependable marking setup needs suitable guarding and operator training. Fume extraction may be needed depending on the material and process. Confirm that replacement parts and technical support are available. What safety features, installation support, service response, and replacement-part terms are included?

Note: Marking speed and service life vary with the machine configuration, material, process settings, operating environment, and maintenance. Request a documented specification and a sample test before making a purchase.

Match the Work Area, Marking Speed, and Precision to Your Parts

Tip: Match the work area to your largest part and its fixture, not just the bare component. A 100 mm plate may need extra clearance for clamps, rotation, or repeatable loading. Leave room for the operator’s hands, too. An oversized field can make fine details harder to mark, while an undersized one forces awkward repositioning. Measure real parts before comparing machine specifications.

Tip: Treat speed as a production result, not a headline number. A fast scan setting may create pale marks, uneven edges, or excess heat on small text. Test the intended material, surface finish, and mark depth using a representative sample. Then time the full cycle, including loading, focusing, and inspection. The scanner is only part of the wait. A modest speed may produce more consistent contrast across a batch. Check that carefully.

Tip: Choose precision based on the smallest feature your parts actually require. Review line width, minimum text size, focal distance, and fixture stability. Fine engraving can expose vibration or focus errors that a large logo hides. If marks must align with edges or holes, request repeatability tests across several parts. One sample is not enough. It is tempting to chase the tightest specification; consider whether it improves readability or simply raises cost.

Review Software, Safety Features, and Production-Line Compatibility

A fiber laser marker should fit your production line, not force operators to redesign it. Check whether its software imports your actual artwork files and supports job presets, user permissions, and traceable revisions. Run a sample job using your smallest text and most reflective part. Small details expose problems quickly. Confirm that the controller can exchange job and status signals with your PLC or production software. Deloitte and MAPI’s 2019 Smart Factory Study reported that 86% of surveyed manufacturers expected smart-factory initiatives to drive competitiveness within five years. That makes practical connectivity worth testing, not merely checking on a feature list.

Safety needs equal attention. Ask how the enclosure, interlocks, warning indicators, and extraction setup work during normal operation and maintenance. Verify the machine’s laser classification and safety documentation with a qualified safety professional; do not infer protection from the word “enclosed.” Test the software’s recovery behavior after a power interruption, too. Can operators reload the correct job without guessing? I still find this easy to overlook.

On the line, a printer may need to mark parts while a conveyor pauses for only a few seconds. Measure cycle time, loading access, and network response in that real setup. A polished demo is not production evidence. Keep the trial records, including failed marks and operator feedback.

Compare Supplier Support, Warranty Terms, and Total Ownership Costs

A low purchase price can hide expensive delays. When comparing fiber laser marking printers, ask who will help after installation. Can a technician review a sample mark remotely? Is phone support available during your working hours? Request typical response times in writing, not just a promise of “fast service.” A small test on your own material can reveal more than a polished demonstration.

Read warranty terms closely. Check how long the laser source, marking head, controller, and other key parts are covered. Find out whether labor, shipping, and troubleshooting are included. Ask what happens if a fault appears just after the warranty ends. Keep the answer with your quotation. Details matter.

Then estimate total ownership costs over several years. Include installation, operator training, software updates, replacement lenses, fixtures, and any needed ventilation or electrical work. A printer that runs reliably may cost less than a cheaper unit that sits idle while parts are shipped. Ask the supplier for a maintenance schedule and prices for common spare parts. Compare those figures with the machine’s expected workload. The spreadsheet still misses some things, like a delayed production order; it may also exaggerate small costs. I would leave room for both errors.

7 Tips for Buying Fiber Laser Marking Printers

Compare supplier support, warranty terms, and total ownership costs.

Example buyer-priority scores on a 1–5 scale, not supplier ratings or market data. Compare written warranty coverage, service response commitments, spare-parts availability, and itemized operating costs when evaluating quotes.